Today I'm going to show you how to do this shelf makeover.


Pretty plain, huh?
I decided to make this tutorial because I searched all over the web and I just could not find any shelves like this that people had refurbished. So I figured out how to do it myself and now I'm sharing how I did it with you guys! So let's begin!
You will need:
- A shelf, of course. :-)
- Fine grade sandpaper
- Fabric or paper in the pattern of your choosing.
- 2 cans of Spray Paint (or a half gallon of wall paint and paint brushes) in any color you like
- Spray adhesive. (I used Elmer's Spray Adhesive)
- Something to protect your work surface
First, I took the back panel off of my shelf and set it aside.(I removed the small front piece you see in the after photo before I took pics, sorry)


 |


<--- After I was done this is what I had.
I made sure to keep track of how the pieces were put together and then reassembled the shelf to make sure it all fit right. You don't have to do this though.

After you have your shelf all sanded down, wipe off any leftover sawdust and dirt to get ready for painting. You can you use a slightly damp cloth for this, but make sure the wood is dry before painting.
Lay out something to protect the surface underneath where you are painting like newspaper, or a drop cloth. If you are using spray paint like I did, spray 1-2 light coats on one side and let dry. Then do the same thing to the other side. If it needs more coverage, add another light coat.


If you are using canned paint and brushes, you should only need one or two coats. Paint in even stokes with the grain of the wood. Either way, let dry between each coat.
Now let's focus our attention on the back of the shelf.
First, measure the back and add a few inches to each side. Then cut your paper or fabric. I used a wrapping paper with grid lines for easy cutting, but I recommend using something a bit sturdier.


Continue all the way up and make sure you smooth out any air bubbles.

Once you get to the top, fold over the excess and glue it over the back. Do this on all sides.


An there you go! The back is done!
Now, reassemble your shelf and secure the back on to it with glue, staples, really small nails, etc. Whatever works for you. Mine was attached with big staples.
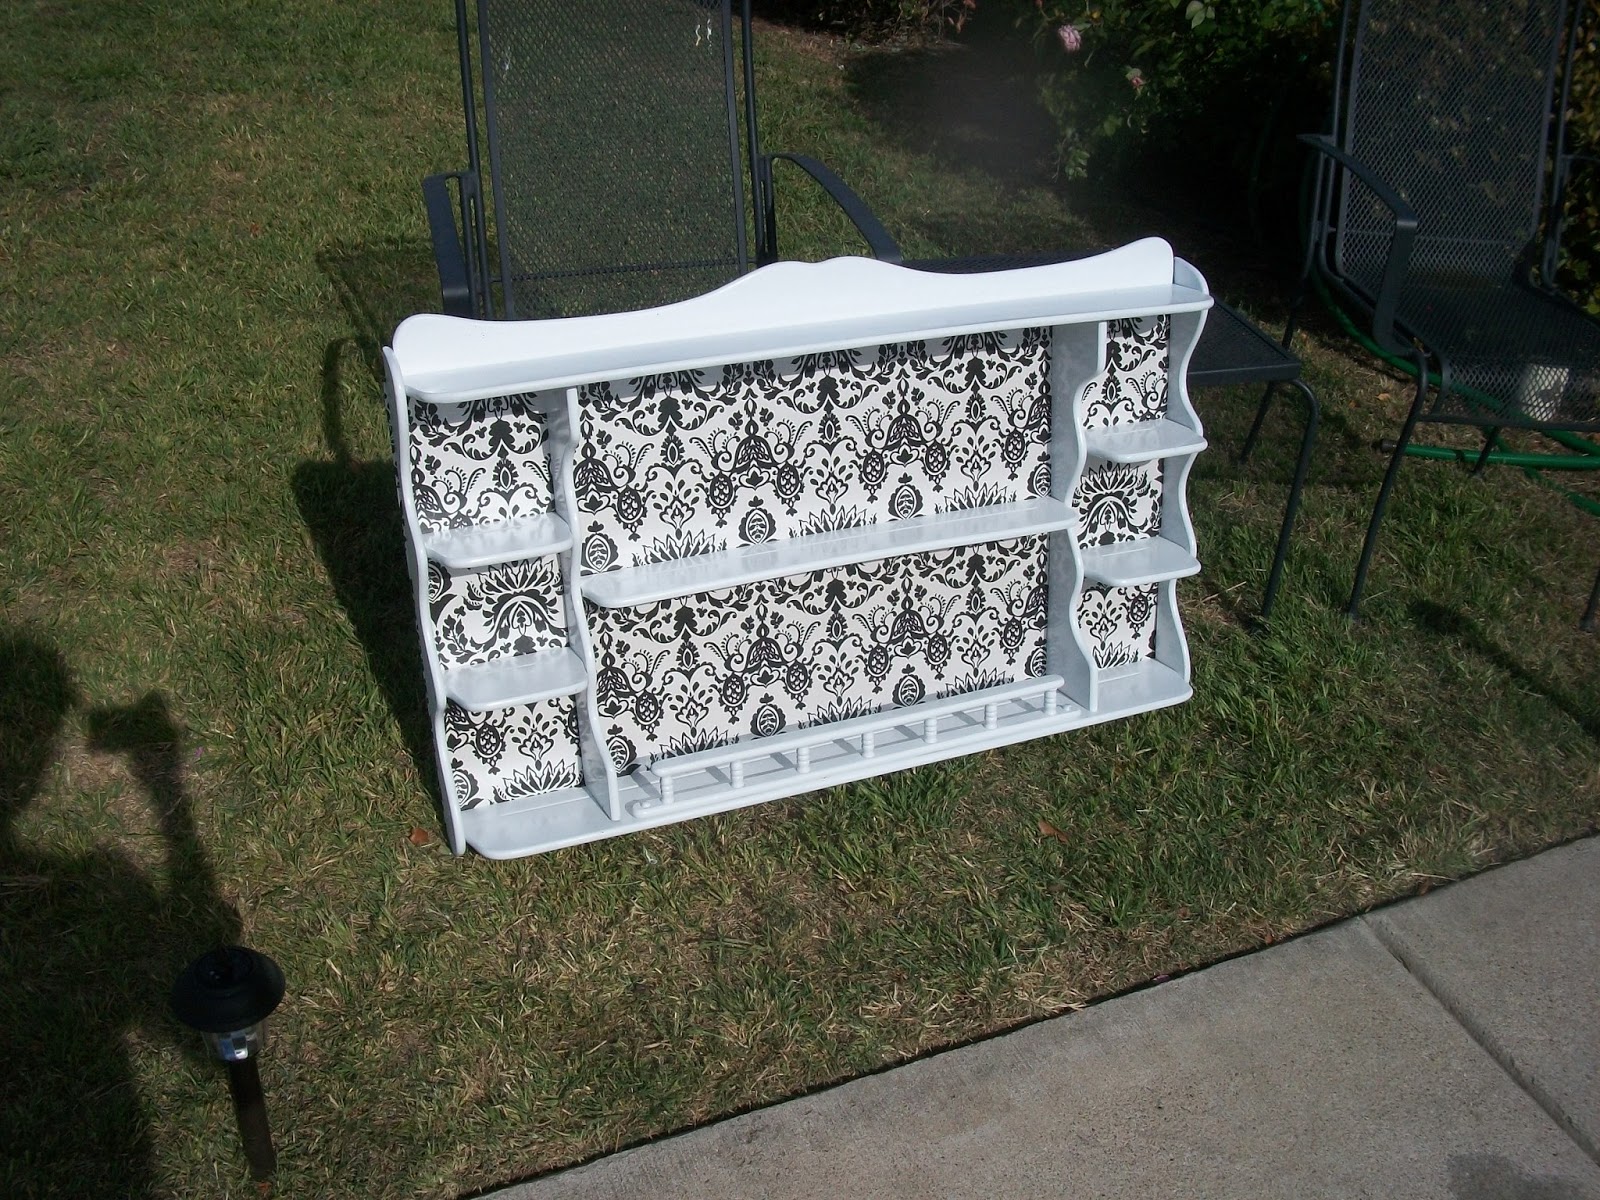
TA DA! A beautiful piece to have in my home. :-)


No comments:
Post a Comment